The following quests in these regions have been 'enhanced' with improved quest rewards. Section 1 is enhanced key quests, section 2 is enhanced story quests.
Enhanced Key Quests [ ]
Desert Sticker
NPC: Sandman
Location:
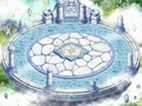
Beach Town - Paradise
Condition:
Request:
5x
Desert Sticker
{{{request_2}}}
{{{request_3}}}
{{{request_4}}}
{{{request_5}}}
Quest Cycles: 1
XP: 71340
TM XP: 861769
{{{reward_custom_1_text}}}:
{{{reward_custom_1}}}
{{{reward_custom_2_text}}}:
{{{reward_custom_2}}}
{{{reward_custom_3_text}}}:
{{{reward_custom_3}}}
{{{reward_custom_4_text}}}:
{{{reward_custom_4}}}
{{{reward_custom_5_text}}}:
{{{reward_custom_5}}}
Cycle 1:
Cycle 2:
{{{reward_2}}}
Cycle 3:
{{{reward_3}}}
Cycle 4:
{{{reward_4}}}
Cycle 5:
{{{reward_5}}}
Cycle 6:
{{{reward_6}}}
Cycle 7:
{{{reward_7}}}
Cycle 8:
{{{reward_8}}}
Cycle 9:
{{{reward_9}}}
Cycle 10:
{{{reward_10}}}
Notes:
A
Desert Sticker can be obtained by completing one of the following quests:
{{{notes_2}}}
{{{notes_3}}}
{{{notes_4}}}
{{{notes_5}}}
Legendary Recipe
NPC: Sandman
Location:
Beach Town - Paradise
Condition:
Request:
5x
Sand Cake
2x
Limestone
1x
Garden Trowel
1x
Oasis Water
1x
Sand Glass
Quest Cycles: 1
XP: 71340
TM XP: 861769
{{{reward_custom_1_text}}}:
{{{reward_custom_1}}}
{{{reward_custom_2_text}}}:
{{{reward_custom_2}}}
{{{reward_custom_3_text}}}:
{{{reward_custom_3}}}
{{{reward_custom_4_text}}}:
{{{reward_custom_4}}}
{{{reward_custom_5_text}}}:
{{{reward_custom_5}}}
Cycle 1:
5x
500 Galder Coupon 1x
Ice Boy 1x
Ice Girl
Cycle 2:
{{{reward_2}}}
Cycle 3:
{{{reward_3}}}
Cycle 4:
{{{reward_4}}}
Cycle 5:
{{{reward_5}}}
Cycle 6:
{{{reward_6}}}
Cycle 7:
{{{reward_7}}}
Cycle 8:
{{{reward_8}}}
Cycle 9:
{{{reward_9}}}
Cycle 10:
{{{reward_10}}}
Notes:
Love Hunter Robin's Request 1
NPC: Love Hunter Robin
Location:
Southwest Forest
Condition:
Request:
Quest Cycles: 5
XP: 0
TM XP: 15701
Per cycle:
2x
Soil Attribute Stone
{{{reward_custom_2_text}}}:
{{{reward_custom_2}}}
{{{reward_custom_3_text}}}:
{{{reward_custom_3}}}
{{{reward_custom_4_text}}}:
{{{reward_custom_4}}}
{{{reward_custom_5_text}}}:
{{{reward_custom_5}}}
Cycle 1:
{{{reward_1}}}
Cycle 2:
{{{reward_2}}}
Cycle 3:
{{{reward_3}}}
Cycle 4:
{{{reward_4}}}
Cycle 5:
{{{reward_5}}}
Cycle 6:
{{{reward_6}}}
Cycle 7:
{{{reward_7}}}
Cycle 8:
{{{reward_8}}}
Cycle 9:
{{{reward_9}}}
Cycle 10:
{{{reward_10}}}
Notes:
{{{notes_2}}}
{{{notes_3}}}
{{{notes_4}}}
{{{notes_5}}}
Love Hunter Robin's Request 2
NPC: Love Hunter Robin
Location:
Southwest Forest
Condition:
Request:
Quest Cycles: 5
XP: 0
TM XP: 32819
Per cycle:
3x
Soil Attribute Stone
{{{reward_custom_2_text}}}:
{{{reward_custom_2}}}
{{{reward_custom_3_text}}}:
{{{reward_custom_3}}}
{{{reward_custom_4_text}}}:
{{{reward_custom_4}}}
{{{reward_custom_5_text}}}:
{{{reward_custom_5}}}
Cycle 1:
{{{reward_1}}}
Cycle 2:
{{{reward_2}}}
Cycle 3:
{{{reward_3}}}
Cycle 4:
{{{reward_4}}}
Cycle 5:
{{{reward_5}}}
Cycle 6:
{{{reward_6}}}
Cycle 7:
{{{reward_7}}}
Cycle 8:
{{{reward_8}}}
Cycle 9:
{{{reward_9}}}
Cycle 10:
{{{reward_10}}}
Notes:
{{{notes_2}}}
{{{notes_3}}}
{{{notes_4}}}
{{{notes_5}}}
Love Hunter Robin's Request 3
NPC: Love Hunter Robin
Location:
Southwest Forest
Condition:
Request:
Quest Cycles: 5
XP: 0
TM XP: 79984
Per cycle:
5x
Soil Attribute Stone
{{{reward_custom_2_text}}}:
{{{reward_custom_2}}}
{{{reward_custom_3_text}}}:
{{{reward_custom_3}}}
{{{reward_custom_4_text}}}:
{{{reward_custom_4}}}
{{{reward_custom_5_text}}}:
{{{reward_custom_5}}}
Cycle 1:
{{{reward_1}}}
Cycle 2:
{{{reward_2}}}
Cycle 3:
{{{reward_3}}}
Cycle 4:
{{{reward_4}}}
Cycle 5:
{{{reward_5}}}
Cycle 6:
{{{reward_6}}}
Cycle 7:
{{{reward_7}}}
Cycle 8:
{{{reward_8}}}
Cycle 9:
{{{reward_9}}}
Cycle 10:
{{{reward_10}}}
Notes:
{{{notes_2}}}
{{{notes_3}}}
{{{notes_4}}}
{{{notes_5}}}
Scared Poppuri's Concern
NPC: Scared Poppuri
Location:
Southeast Forest
Condition:
Request:
1x
Toy Box
{{{request_2}}}
{{{request_3}}}
{{{request_4}}}
{{{request_5}}}
Quest Cycles: 1
XP: 51484350
TM XP: 8044888
Cycle 1:
1x
Poppuri Bean
{{{reward_custom_2_text}}}:
{{{reward_custom_2}}}
{{{reward_custom_3_text}}}:
{{{reward_custom_3}}}
{{{reward_custom_4_text}}}:
{{{reward_custom_4}}}
{{{reward_custom_5_text}}}:
{{{reward_custom_5}}}
Cycle 1:
{{{reward_1}}}
Cycle 2:
{{{reward_2}}}
Cycle 3:
{{{reward_3}}}
Cycle 4:
{{{reward_4}}}
Cycle 5:
{{{reward_5}}}
Cycle 6:
{{{reward_6}}}
Cycle 7:
{{{reward_7}}}
Cycle 8:
{{{reward_8}}}
Cycle 9:
{{{reward_9}}}
Cycle 10:
{{{reward_10}}}
Notes:
{{{notes_2}}}
{{{notes_3}}}
{{{notes_4}}}
{{{notes_5}}}
Fix Toys
NPC: Artisan Poppuri
Location:
Gate of Poppuri Dungeon
Condition:
Level 300+, have completed Scared Poppuri - Look for Toys
Request:
1x
Teddy Bear
1x
Squeaky Hammer
1x
Robot Model Kit
1x
Exchange Dairy
4x
Instant Adhesive
Quest Cycles: 1
XP: 51484350
TM XP: 8044888
Cycle 1:
1x Mended Toy Box
{{{reward_custom_2_text}}}:
{{{reward_custom_2}}}
{{{reward_custom_3_text}}}:
{{{reward_custom_3}}}
{{{reward_custom_4_text}}}:
{{{reward_custom_4}}}
{{{reward_custom_5_text}}}:
{{{reward_custom_5}}}
Cycle 1:
{{{reward_1}}}
Cycle 2:
{{{reward_2}}}
Cycle 3:
{{{reward_3}}}
Cycle 4:
{{{reward_4}}}
Cycle 5:
{{{reward_5}}}
Cycle 6:
{{{reward_6}}}
Cycle 7:
{{{reward_7}}}
Cycle 8:
{{{reward_8}}}
Cycle 9:
{{{reward_9}}}
Cycle 10:
{{{reward_10}}}
Notes:
Instant Adhesive can be obtained by completing one of the following quests:
Vagabond Eloy - Eloy's Skin Care Hungry Poppuri - Poppuri's Special Snack Poppuri - Poppuri's Request Poppuri - Get the Special Whistle Blue Muffler Poppuri - I Don't Like Vampire Bats Blue Muffler Poppuri - Purifying Poppuri Dungeon ndiana John - Indiana John at Poppuri Dungeon (1) ndiana John - Indiana John at Poppuri Dungeon (2)
{{{notes_2}}}
{{{notes_3}}}
{{{notes_4}}}
{{{notes_5}}}
Poppuri Redemption
NPC: Scared Poppuri
Location:
Southeast Forest
Condition:
Request:
Give the 1x Mended Toy Box
to Stern Poppuri in Poppuri Dungeon - Slide Cave
{{{request_2}}}
{{{request_3}}}
{{{request_4}}}
{{{request_5}}}
Quest Cycles: 1
XP: 51484350
TM XP: 8044888
Cycle 1:
9x
Poppuri Bean 10x Artisan Flame
{{{reward_custom_2_text}}}:
{{{reward_custom_2}}}
{{{reward_custom_3_text}}}:
{{{reward_custom_3}}}
{{{reward_custom_4_text}}}:
{{{reward_custom_4}}}
{{{reward_custom_5_text}}}:
{{{reward_custom_5}}}
Cycle 1:
{{{reward_1}}}
Cycle 2:
{{{reward_2}}}
Cycle 3:
{{{reward_3}}}
Cycle 4:
{{{reward_4}}}
Cycle 5:
{{{reward_5}}}
Cycle 6:
{{{reward_6}}}
Cycle 7:
{{{reward_7}}}
Cycle 8:
{{{reward_8}}}
Cycle 9:
{{{reward_9}}}
Cycle 10:
{{{reward_10}}}
Notes:
Stern Poppuri is in front of the portal to Gate of Poppuri Dungeon in Poppuri Dungeon - Slide Cave.
{{{notes_2}}}
{{{notes_3}}}
{{{notes_4}}}
{{{notes_5}}}
Journey to Caballa Relics
NPC: Stern Poppuri
Location:
Poppuri Dungeon - Slide Cave
Condition:
Request:
Find and talk to Wise Hen in Gate of Caballa Relics
{{{request_2}}}
{{{request_3}}}
{{{request_4}}}
{{{request_5}}}
Quest Cycles: 1
XP: 7044888
TM XP: 6044888
Cycle 1:
1x
Chronos' Broom 1x
Janus' Broom
{{{reward_custom_2_text}}}:
{{{reward_custom_2}}}
{{{reward_custom_3_text}}}:
{{{reward_custom_3}}}
{{{reward_custom_4_text}}}:
{{{reward_custom_4}}}
{{{reward_custom_5_text}}}:
{{{reward_custom_5}}}
Cycle 1:
{{{reward_1}}}
Cycle 2:
{{{reward_2}}}
Cycle 3:
{{{reward_3}}}
Cycle 4:
{{{reward_4}}}
Cycle 5:
{{{reward_5}}}
Cycle 6:
{{{reward_6}}}
Cycle 7:
{{{reward_7}}}
Cycle 8:
{{{reward_8}}}
Cycle 9:
{{{reward_9}}}
Cycle 10:
{{{reward_10}}}
Notes:
Wise Hen is walking around in the Northeast corner of the map, do not confuse him with Weirdo Hen.
{{{notes_2}}}
{{{notes_3}}}
{{{notes_4}}}
{{{notes_5}}}
Caballa Stickers
NPC: Fortune Teller
Location:
Relics Town - Azteca
Condition:
Request:
10x
Caballa Sticker
Quest Cycles: 1
XP: 481998
TM XP: 9636201
{{{reward_custom_1_text}}}:
{{{reward_custom_1}}}
{{{reward_custom_2_text}}}:
{{{reward_custom_2}}}
{{{reward_custom_3_text}}}:
{{{reward_custom_3}}}
{{{reward_custom_4_text}}}:
{{{reward_custom_4}}}
{{{reward_custom_5_text}}}:
{{{reward_custom_5}}}
Cycle 1:
1x
Pink Ice Ring 1x
Blue Ice Ring
Cycle 2:
{{{reward_2}}}
Cycle 3:
{{{reward_3}}}
Cycle 4:
{{{reward_4}}}
Cycle 5:
{{{reward_5}}}
Cycle 6:
{{{reward_6}}}
Cycle 7:
{{{reward_7}}}
Cycle 8:
{{{reward_8}}}
Cycle 9:
{{{reward_9}}}
Cycle 10:
{{{reward_10}}}
Notes:
A
Caballa Sticker can be obtained by completing one of the following quests:
Return the Gold Silk Pouch
NPC: Keeper Julio
Location:
Relics Field 4 - An Altar for Sacrifice
Condition:
Request:
1x
Gold Silk Pouch
1x
Adventurer's Book
Quest Cycles: 1
XP: 771198
TM XP: 9272403
{{{reward_custom_1_text}}}:
{{{reward_custom_1}}}
{{{reward_custom_2_text}}}:
{{{reward_custom_2}}}
{{{reward_custom_3_text}}}:
{{{reward_custom_3}}}
{{{reward_custom_4_text}}}:
{{{reward_custom_4}}}
{{{reward_custom_5_text}}}:
{{{reward_custom_5}}}
Cycle 1:
1x
Weapon Ticket B 1x
Adventurer's Book
Cycle 2:
{{{reward_2}}}
Cycle 3:
{{{reward_3}}}
Cycle 4:
{{{reward_4}}}
Cycle 5:
{{{reward_5}}}
Cycle 6:
{{{reward_6}}}
Cycle 7:
{{{reward_7}}}
Cycle 8:
{{{reward_8}}}
Cycle 9:
{{{reward_9}}}
Cycle 10:
{{{reward_10}}}
Notes:
Urgent Issue
NPC: Skipper Min
Condition:
Request:
7x
Oops Sticker
Quest Cycles: 1
XP: 5214
TM XP: 17530
{{{reward_custom_1_text}}}:
{{{reward_custom_1}}}
{{{reward_custom_2_text}}}:
{{{reward_custom_2}}}
{{{reward_custom_3_text}}}:
{{{reward_custom_3}}}
{{{reward_custom_4_text}}}:
{{{reward_custom_4}}}
{{{reward_custom_5_text}}}:
{{{reward_custom_5}}}
Cycle 1:
Cycle 2:
Cycle 3:
Cycle 4:
Cycle 5:
Cycle 6:
Cycle 7:
Cycle 8:
Cycle 9:
Cycle 10:
Notes:
An
Oops Sticker can be obtained by completing one of the following quests:
Lost Ship's Log
NPC: Mighty Captain Stan
Condition:
Request:
1x
Voyage Log p9
1x
Voyage Log p25
1x
Voyage Log p31
{{{request_4}}}
{{{request_5}}}
Quest Cycles: 1
XP: 260749
TM XP: 876521
{{{reward_custom_1_text}}}:
{{{reward_custom_1}}}
{{{reward_custom_2_text}}}:
{{{reward_custom_2}}}
{{{reward_custom_3_text}}}:
{{{reward_custom_3}}}
{{{reward_custom_4_text}}}:
{{{reward_custom_4}}}
{{{reward_custom_5_text}}}:
{{{reward_custom_5}}}
Cycle 1:
1x
Old Unsigned Letter 5x
500 Galder Coupon 1x
Pink Chinese Head Accessory 1x
Blue Chinese Head Acessory
Cycle 2:
{{{reward_2}}}
Cycle 3:
{{{reward_3}}}
Cycle 4:
{{{reward_4}}}
Cycle 5:
{{{reward_5}}}
Cycle 6:
{{{reward_6}}}
Cycle 7:
{{{reward_7}}}
Cycle 8:
{{{reward_8}}}
Cycle 9:
{{{reward_9}}}
Cycle 10:
{{{reward_10}}}
Notes:
Mermaid Palace Stickers
NPC: Captain Stan
Location:
Gate of Mermaid Palace
Condition:
Request:
7x
Palace Proof Sticker
1x
Old Picture
Quest Cycles: 1
XP: 141907
TM XP: 3353512
{{{reward_custom_1_text}}}:
{{{reward_custom_1}}}
{{{reward_custom_2_text}}}:
{{{reward_custom_2}}}
{{{reward_custom_3_text}}}:
{{{reward_custom_3}}}
{{{reward_custom_4_text}}}:
{{{reward_custom_4}}}
{{{reward_custom_5_text}}}:
{{{reward_custom_5}}}
Cycle 1:
1x
Captain Stan's Log 1x
Blue Bunny Cape 1x
Pink Bunny Cape
Cycle 2:
Cycle 3:
Cycle 4:
Cycle 5:
Cycle 6:
Cycle 7:
Cycle 8:
Cycle 9:
Cycle 10:
Notes:
A
Palace Proof Sticker can be obtained by completing one of the following quests:
Old Picture
Marin's Sister
NPC: Mermaid Marin
Location:
Mermaid Palace Field 4 - Rock Square
Condition:
Request:
1x
Tanya's Sword
1x
Adventurer's Book
Quest Cycles: 1
XP: 141904
TM XP: 2353512
{{{reward_custom_1_text}}}:
{{{reward_custom_1}}}
{{{reward_custom_2_text}}}:
{{{reward_custom_2}}}
{{{reward_custom_3_text}}}:
{{{reward_custom_3}}}
{{{reward_custom_4_text}}}:
{{{reward_custom_4}}}
{{{reward_custom_5_text}}}:
{{{reward_custom_5}}}
Cycle 1:
1x
Tanya's Letter 1x
Adventurer's Book
Cycle 2:
{{{reward_2}}}
Cycle 3:
{{{reward_3}}}
Cycle 4:
{{{reward_4}}}
Cycle 5:
{{{reward_5}}}
Cycle 6:
{{{reward_6}}}
Cycle 7:
{{{reward_7}}}
Cycle 8:
{{{reward_8}}}
Cycle 9:
{{{reward_9}}}
Cycle 10:
{{{reward_10}}}
Notes:
Tanya's Sword is dropped by
Tanya .
Collect Ritual Supplies
NPC: Chief Koha
Location:
Ghost Blue Seabed Town - Aquarius
Condition:
Request:
3x
Pure Water
3x
Dead Man's Incense
3x
Whale Essence
{{{request_4}}}
{{{request_5}}}
Quest Cycles: 1
XP: 1599860
TM XP: 13383004
{{{reward_custom_1_text}}}:
{{{reward_custom_1}}}
{{{reward_custom_2_text}}}:
{{{reward_custom_2}}}
{{{reward_custom_3_text}}}:
{{{reward_custom_3}}}
{{{reward_custom_4_text}}}:
{{{reward_custom_4}}}
{{{reward_custom_5_text}}}:
{{{reward_custom_5}}}
Cycle 1:
1x
10000 Galder Coupon 10x
Erin's Secret Book
Cycle 2:
{{{reward_2}}}
Cycle 3:
{{{reward_3}}}
Cycle 4:
{{{reward_4}}}
Cycle 5:
{{{reward_5}}}
Cycle 6:
{{{reward_6}}}
Cycle 7:
{{{reward_7}}}
Cycle 8:
{{{reward_8}}}
Cycle 9:
{{{reward_9}}}
Cycle 10:
{{{reward_10}}}
Notes:
Quest: Werewolf Lycan - Lycan's Answer Reward: 3x Hecate's Broom
Rose Garden Sticker
NPC: Rosaline Gracia
Location:
Rose Field 1 - Stairway to Sorrow
Condition:
Request:
13x
Rose Garden Sticker
{{{request_2}}}
{{{request_3}}}
{{{request_4}}}
{{{request_5}}}
Quest Cycles: 1
XP: 3485492
TM XP: 55306493
{{{reward_custom_1_text}}}:
{{{reward_custom_1}}}
{{{reward_custom_2_text}}}:
{{{reward_custom_2}}}
{{{reward_custom_3_text}}}:
{{{reward_custom_3}}}
{{{reward_custom_4_text}}}:
{{{reward_custom_4}}}
{{{reward_custom_5_text}}}:
{{{reward_custom_5}}}
Cycle 1:
Cycle 2:
{{{reward_2}}}
Cycle 3:
{{{reward_3}}}
Cycle 4:
{{{reward_4}}}
Cycle 5:
{{{reward_5}}}
Cycle 6:
{{{reward_6}}}
Cycle 7:
{{{reward_7}}}
Cycle 8:
{{{reward_8}}}
Cycle 9:
{{{reward_9}}}
Cycle 10:
{{{reward_10}}}
Notes:
A
Rose Garden Sticker can be obtained by completing one of the following quests:
{{{notes_2}}}
{{{notes_3}}}
{{{notes_4}}}
{{{notes_5}}}
Quest: Pastor Tau - Swamp Stickers Reward: 10x PandaTO Coupon D and 5x PandaTO Coupon E
Quest: Pastor Tau - Tau's Dream Reward: 10x Hardant Box 270
Quest: Interpret Chagan's Dream Reward: 20x PandaTO Coupon C's
Black Swamp Treasure 1
NPC: Lethos
Location:
Swamp Town - Carbigal
Condition:
Request:
3x
Swamp Shark Teeth
{{{request_2}}}
{{{request_3}}}
{{{request_4}}}
{{{request_5}}}
Quest Cycles: 1
XP: 3915522
TM XP: 0
Cycle 1:
1x Secret Card No. 1
and 1x Secret Card No. 2
{{{reward_custom_2_text}}}:
{{{reward_custom_2}}}
{{{reward_custom_3_text}}}:
{{{reward_custom_3}}}
{{{reward_custom_4_text}}}:
{{{reward_custom_4}}}
{{{reward_custom_5_text}}}:
{{{reward_custom_5}}}
Cycle 1:
{{{reward_1}}}
Cycle 2:
{{{reward_2}}}
Cycle 3:
{{{reward_3}}}
Cycle 4:
{{{reward_4}}}
Cycle 5:
{{{reward_5}}}
Cycle 6:
{{{reward_6}}}
Cycle 7:
{{{reward_7}}}
Cycle 8:
{{{reward_8}}}
Cycle 9:
{{{reward_9}}}
Cycle 10:
{{{reward_10}}}
Notes:
Use Secret Cards to obtain a Guardian.
{{{notes_3}}}
{{{notes_4}}}
{{{notes_5}}}
Black Swamp Treasure 2
NPC: Lethos
Location:
Swamp Town - Carbigal
Condition:
Request:
3x
Lotus Fruit
{{{request_2}}}
{{{request_3}}}
{{{request_4}}}
{{{request_5}}}
Quest Cycles: 1
XP: 3915522
TM XP: 0
Cycle 1:
1x Secret Card No. 3
and 1x Secret Card No. 4
{{{reward_custom_2_text}}}:
{{{reward_custom_2}}}
{{{reward_custom_3_text}}}:
{{{reward_custom_3}}}
{{{reward_custom_4_text}}}:
{{{reward_custom_4}}}
{{{reward_custom_5_text}}}:
{{{reward_custom_5}}}
Cycle 1:
{{{reward_1}}}
Cycle 2:
{{{reward_2}}}
Cycle 3:
{{{reward_3}}}
Cycle 4:
{{{reward_4}}}
Cycle 5:
{{{reward_5}}}
Cycle 6:
{{{reward_6}}}
Cycle 7:
{{{reward_7}}}
Cycle 8:
{{{reward_8}}}
Cycle 9:
{{{reward_9}}}
Cycle 10:
{{{reward_10}}}
Notes:
Use Secret Cards to obtain a Guardian.
{{{notes_3}}}
{{{notes_4}}}
{{{notes_5}}}
Black Swamp Treasure 3
NPC: Lethos
Location:
Swamp Town - Carbigal
Condition:
Request:
3x
Stoor Worm's Horn
{{{request_2}}}
{{{request_3}}}
{{{request_4}}}
{{{request_5}}}
Quest Cycles: 1
XP: 3915522
TM XP: 0
Cycle 1:
1x Secret Card No. 5
and 1x Secret Card No. 6
{{{reward_custom_2_text}}}:
{{{reward_custom_2}}}
{{{reward_custom_3_text}}}:
{{{reward_custom_3}}}
{{{reward_custom_4_text}}}:
{{{reward_custom_4}}}
{{{reward_custom_5_text}}}:
{{{reward_custom_5}}}
Cycle 1:
{{{reward_1}}}
Cycle 2:
{{{reward_2}}}
Cycle 3:
{{{reward_3}}}
Cycle 4:
{{{reward_4}}}
Cycle 5:
{{{reward_5}}}
Cycle 6:
{{{reward_6}}}
Cycle 7:
{{{reward_7}}}
Cycle 8:
{{{reward_8}}}
Cycle 9:
{{{reward_9}}}
Cycle 10:
{{{reward_10}}}
Notes:
Use Secret Cards to obtain a Guardian.
{{{notes_3}}}
{{{notes_4}}}
{{{notes_5}}}
Black Swamp Treasure 4
NPC: Lethos
Location:
Swamp Town - Carbigal
Condition:
Request:
3x
Feeler Eyes
{{{request_2}}}
{{{request_3}}}
{{{request_4}}}
{{{request_5}}}
Quest Cycles: 1
XP: 3915522
TM XP: 0
Cycle 1:
1x Secret Card No. 7
and 1x Secret Card No. 8
{{{reward_custom_2_text}}}:
{{{reward_custom_2}}}
{{{reward_custom_3_text}}}:
{{{reward_custom_3}}}
{{{reward_custom_4_text}}}:
{{{reward_custom_4}}}
{{{reward_custom_5_text}}}:
{{{reward_custom_5}}}
Cycle 1:
{{{reward_1}}}
Cycle 2:
{{{reward_2}}}
Cycle 3:
{{{reward_3}}}
Cycle 4:
{{{reward_4}}}
Cycle 5:
{{{reward_5}}}
Cycle 6:
{{{reward_6}}}
Cycle 7:
{{{reward_7}}}
Cycle 8:
{{{reward_8}}}
Cycle 9:
{{{reward_9}}}
Cycle 10:
{{{reward_10}}}
Notes:
Use Secret Cards to obtain a Guardian.
{{{notes_3}}}
{{{notes_4}}}
{{{notes_5}}}
Quest: Grandpa Tango - Techichi Recommendation Sticker Reward: 5x PandaTO E Coupon and 10x Flashire Snake Boxes
Dark Spirit Punishment 10
NPC: Shaman Girl Jia
Location:
Gate of Techichi
Condition:
Request:
Quest Cycles: 1 (daily)
XP: 3332190
TM XP: 476447
Cycle 1:
{{{reward_custom_2_text}}}:
{{{reward_custom_2}}}
{{{reward_custom_3_text}}}:
{{{reward_custom_3}}}
{{{reward_custom_4_text}}}:
{{{reward_custom_4}}}
{{{reward_custom_5_text}}}:
{{{reward_custom_5}}}
Cycle 1:
{{{reward_1}}}
Cycle 2:
{{{reward_2}}}
Cycle 3:
{{{reward_3}}}
Cycle 4:
{{{reward_4}}}
Cycle 5:
{{{reward_5}}}
Cycle 6:
{{{reward_6}}}
Cycle 7:
{{{reward_7}}}
Cycle 8:
{{{reward_8}}}
Cycle 9:
{{{reward_9}}}
Cycle 10:
{{{reward_10}}}
Notes:
Activate Mind's Eye to see Shaman Girl Jia and accept her quest.
Quest repeatable daily, server resets at 12 AM GMT+0.
{{{notes_3}}}
{{{notes_4}}}
{{{notes_5}}}
Tapasco Recommendation Sticker
NPC: Clerk Z. Smith
Location:
Tapasco Field 1 - Net of Lava
Condition:
Request:
9x
Tapasco Sticker
1x Adventure Book
{{{request_3}}}
{{{request_4}}}
{{{request_5}}}
Quest Cycles: 1
XP: 9497349
TM XP: 5338386
Cycle 1:
{{{reward_custom_2_text}}}:
{{{reward_custom_2}}}
{{{reward_custom_3_text}}}:
{{{reward_custom_3}}}
{{{reward_custom_4_text}}}:
{{{reward_custom_4}}}
{{{reward_custom_5_text}}}:
{{{reward_custom_5}}}
Cycle 1:
{{{reward_1}}}
Cycle 2:
{{{reward_2}}}
Cycle 3:
{{{reward_3}}}
Cycle 4:
{{{reward_4}}}
Cycle 5:
{{{reward_5}}}
Cycle 6:
{{{reward_6}}}
Cycle 7:
{{{reward_7}}}
Cycle 8:
{{{reward_8}}}
Cycle 9:
{{{reward_9}}}
Cycle 10:
{{{reward_10}}}
Notes:
{{{notes_1}}}
{{{notes_2}}}
{{{notes_3}}}
{{{notes_4}}}
{{{notes_5}}}
Ptah's Secrets
NPC: Blacksmith Marx
Location:
Tapasco Field 1 - Net of Lava
Condition:
Level 600+, have completed Clerk Z. Smith - Absolute Ring
Request:
2x
Hot Iron
2x
Whetstone
{{{request_3}}}
{{{request_4}}}
{{{request_5}}}
Quest Cycles: 1
XP: 9497349
TM XP: 5338386
Cycle 1:
{{{reward_custom_2_text}}}:
{{{reward_custom_2}}}
{{{reward_custom_3_text}}}:
{{{reward_custom_3}}}
{{{reward_custom_4_text}}}:
{{{reward_custom_4}}}
{{{reward_custom_5_text}}}:
{{{reward_custom_5}}}
Cycle 1:
{{{reward_1}}}
Cycle 2:
{{{reward_2}}}
Cycle 3:
{{{reward_3}}}
Cycle 4:
{{{reward_4}}}
Cycle 5:
{{{reward_5}}}
Cycle 6:
{{{reward_6}}}
Cycle 7:
{{{reward_7}}}
Cycle 8:
{{{reward_8}}}
Cycle 9:
{{{reward_9}}}
Cycle 10:
{{{reward_10}}}
Notes:
Hot Iron and
Whetstone are drilled in Tapasco Volcano Fields.
{{{notes_2}}}
{{{notes_3}}}
{{{notes_4}}}
{{{notes_5}}}
For Their Goals
NPC: Blacksmith Marx
Location:
Tapasco Field 2 - Rhythm of Hammer
Condition:
Level 600+, have completed Blacksmith Marx - The Ring's Abilities
Request:
1x Adventurer's Book
{{{request_2}}}
{{{request_3}}}
{{{request_4}}}
{{{request_5}}}
Quest Cycles: 1
XP: 994330
TM XP: 545262
Cycle 1:
{{{reward_custom_2_text}}}:
{{{reward_custom_2}}}
{{{reward_custom_3_text}}}:
{{{reward_custom_3}}}
{{{reward_custom_4_text}}}:
{{{reward_custom_4}}}
{{{reward_custom_5_text}}}:
{{{reward_custom_5}}}
Cycle 1:
{{{reward_1}}}
Cycle 2:
{{{reward_2}}}
Cycle 3:
{{{reward_3}}}
Cycle 4:
{{{reward_4}}}
Cycle 5:
{{{reward_5}}}
Cycle 6:
{{{reward_6}}}
Cycle 7:
{{{reward_7}}}
Cycle 8:
{{{reward_8}}}
Cycle 9:
{{{reward_9}}}
Cycle 10:
{{{reward_10}}}
Notes:
{{{notes_1}}}
{{{notes_2}}}
{{{notes_3}}}
{{{notes_4}}}
{{{notes_5}}}
Fundraiser for the Polar Bear
NPC: Mighty Captain Stan
Location:
Tapasco Field 1 - Net of Lava
Condition:
Request:
2x
Diamond
2x
Sapphire
2x
Ruby
{{{request_4}}}
{{{request_5}}}
Quest Cycles: 5
XP: 7705181
TM XP: 0
Cycle 1:
1x
Chili Paste Jar
Cycle 2:
Cycle 3:
1x
Chili Paste Jar
Cycle 4:
Cycle 5:
1x
Tapasco Sticker 1x Freezer Ticket
Cycle 1:
{{{reward_1}}}
Cycle 2:
{{{reward_2}}}
Cycle 3:
{{{reward_3}}}
Cycle 4:
{{{reward_4}}}
Cycle 5:
{{{reward_5}}}
Cycle 6:
{{{reward_6}}}
Cycle 7:
{{{reward_7}}}
Cycle 8:
{{{reward_8}}}
Cycle 9:
{{{reward_9}}}
Cycle 10:
{{{reward_10}}}
Notes:
Diamond ,
Sapphire , and
Ruby are drilled in Tapasco Volcano Fields and Gate of Tapasco Volcano, as well as Abyss Fields.
Drilled items in this quest line are drilled at higher rates in Gate of Tapasco Volcano.
{{{notes_3}}}
{{{notes_4}}}
{{{notes_5}}}
Flaming Chicken Warriors
NPC: Cluck Cluck Warrior
Location:
Tapasco Field 2 - Rhythm of Hammer
Condition:
Request:
2x
Tapasco Pepper
2x
Fire Flower
{{{request_3}}}
{{{request_4}}}
{{{request_5}}}
Quest Cycles: 5
XP: 7705181
TM XP: 0
Cycle 1:
Cycle 2:
1x
Chili Paste Jar
Cycle 3:
Cycle 4:
1x
Chili Paste Jar
Cycle 5:
and 1x
Tapasco Sticker
Cycle 1:
{{{reward_1}}}
Cycle 2:
{{{reward_2}}}
Cycle 3:
{{{reward_3}}}
Cycle 4:
{{{reward_4}}}
Cycle 5:
{{{reward_5}}}
Cycle 6:
{{{reward_6}}}
Cycle 7:
{{{reward_7}}}
Cycle 8:
{{{reward_8}}}
Cycle 9:
{{{reward_9}}}
Cycle 10:
{{{reward_10}}}
Notes:
{{{notes_2}}}
{{{notes_3}}}
{{{notes_4}}}
{{{notes_5}}}
For the Best Salt...
NPC: Sophia
Location:
Tapasco Field 2 - Rhythm of Hammer
Condition:
Request:
3x
Salt Jar
{{{request_2}}}
{{{request_3}}}
{{{request_4}}}
{{{request_5}}}
Quest Cycles: 5
XP: 7705181
TM XP: 0
Cycle 1:
1x
Chili Paste Jar
Cycle 2:
Cycle 2:
1x
Chili Paste Jar
Cycle 4:
Cycle 5:
and 1x
Tapasco Sticker
Cycle 1:
{{{reward_1}}}
Cycle 2:
{{{reward_2}}}
Cycle 3:
{{{reward_3}}}
Cycle 4:
{{{reward_4}}}
Cycle 5:
{{{reward_5}}}
Cycle 6:
{{{reward_6}}}
Cycle 7:
{{{reward_7}}}
Cycle 8:
{{{reward_8}}}
Cycle 9:
{{{reward_9}}}
Cycle 10:
{{{reward_10}}}
Notes:
Salt Jar is drilled in Tapasco Volcano fields.
{{{notes_2}}}
{{{notes_3}}}
{{{notes_4}}}
{{{notes_5}}}
Monkey T's Business Item (8)
NPC: Monkey T
Location:
Tapasco Field 3 - Valley of Flame
Condition:
Request:
1x
Salt Jar
1x
Volcano Water
{{{request_3}}}
{{{request_4}}}
{{{request_5}}}
Quest Cycles: 5
XP: 7705181
TM XP: 0
Cycle 1:
1x
Chili Paste Jar
Cycle 2:
Cycle 3:
1x
Chili Paste Jar
Cycle 4:
Cycle 5:
1x
Tapasco Sticker
Cycle 1:
{{{reward_1}}}
Cycle 2:
{{{reward_2}}}
Cycle 3:
{{{reward_3}}}
Cycle 4:
{{{reward_4}}}
Cycle 5:
{{{reward_5}}}
Cycle 6:
{{{reward_6}}}
Cycle 7:
{{{reward_7}}}
Cycle 8:
{{{reward_8}}}
Cycle 9:
{{{reward_9}}}
Cycle 10:
{{{reward_10}}}
Notes:
Salt Jar and
Volcano Water are drilled in Tapasco Volcano Fields.
Volcano Water Dekumanus File:Monster Dekumanus Idle.gif
{{{notes_3}}}
{{{notes_4}}}
{{{notes_5}}}
Suspenders for the Inventor!
NPC: Inventor Gale
Location:
Tapasco Field 4 - Stairway to Fire
Condition:
Request:
2x
Black Suspenders
{{{request_2}}}
{{{request_3}}}
{{{request_4}}}
{{{request_5}}}
Quest Cycles: 5
XP: 7705181
TM XP: 0
Cycle 1:
1x
Chili Paste Jar
Cycle 2:
Cycle 3:
1x
Chili Paste Jar
Cycle 4:
Cycle 5:
1x
Tapasco Sticker
Cycle 1:
{{{reward_1}}}
Cycle 2:
{{{reward_2}}}
Cycle 3:
{{{reward_3}}}
Cycle 4:
{{{reward_4}}}
Cycle 5:
{{{reward_5}}}
Cycle 6:
{{{reward_6}}}
Cycle 7:
{{{reward_7}}}
Cycle 8:
{{{reward_8}}}
Cycle 9:
{{{reward_9}}}
Cycle 10:
{{{reward_10}}}
Notes:
{{{notes_2}}}
{{{notes_3}}}
{{{notes_4}}}
{{{notes_5}}}
Burner's Secret (2)
NPC: Burner
Location:
Tapasco Lava Lake
Condition:
Request:
2x
Red Fire
2x
Blue Fire
{{{request_3}}}
{{{request_4}}}
{{{request_5}}}
Quest Cycles: 5
XP: 7705181
TM XP: 5
Cycle 1:
Cycle 2:
1x
Chili Paste Jar
Cycle 3:
Cycle 4:
1x
Chili Paste Jar
Cycle 5:
1x
Tapasco Sticker
Cycle 1:
{{{reward_1}}}
Cycle 2:
{{{reward_2}}}
Cycle 3:
{{{reward_3}}}
Cycle 4:
{{{reward_4}}}
Cycle 5:
{{{reward_5}}}
Cycle 6:
{{{reward_6}}}
Cycle 7:
{{{reward_7}}}
Cycle 8:
{{{reward_8}}}
Cycle 9:
{{{reward_9}}}
Cycle 10:
{{{reward_10}}}
Notes:
{{{notes_2}}}
{{{notes_3}}}
{{{notes_4}}}
{{{notes_5}}}
Dark Spirit Punishment 11
NPC: Shaman Girl Jia
Location:
Gate of Tapasco Volcano
Condition:
Request:
Quest Cycles: 1 (daily)
XP: 7705181
TM XP: 0
Cycle 1:
10x
Half Pink Potion 10x
Half Blue Potion 2x
Bonus Egg
{{{reward_custom_2_text}}}:
{{{reward_custom_2}}}
{{{reward_custom_3_text}}}:
{{{reward_custom_3}}}
{{{reward_custom_4_text}}}:
{{{reward_custom_4}}}
{{{reward_custom_5_text}}}:
{{{reward_custom_5}}}
Cycle 1:
{{{reward_1}}}
Cycle 2:
{{{reward_2}}}
Cycle 3:
{{{reward_3}}}
Cycle 4:
{{{reward_4}}}
Cycle 5:
{{{reward_5}}}
Cycle 6:
{{{reward_6}}}
Cycle 7:
{{{reward_7}}}
Cycle 8:
{{{reward_8}}}
Cycle 9:
{{{reward_9}}}
Cycle 10:
{{{reward_10}}}
Notes:
Activate Mind's Eye to see Shaman Girl Jia and accept her quest.
Quest repeatable daily, server resets at 12 AM GMT+0.
{{{notes_3}}}
{{{notes_4}}}
{{{notes_5}}}
Tapasco Theme Spa Questline
NPC: General Manager Penguin
Location:
Tapasco Theme Spa 1st Floor - Bath
Condition:
Request:
WIP
{{{request_3}}}
{{{request_4}}}
{{{request_5}}}
Quest Cycles: 1
XP: N/A
TM XP: N/A
Cycle 1:
WIP
{{{reward_custom_2_text}}}:
{{{reward_custom_2}}}
{{{reward_custom_3_text}}}:
{{{reward_custom_3}}}
{{{reward_custom_4_text}}}:
{{{reward_custom_4}}}
{{{reward_custom_5_text}}}:
{{{reward_custom_5}}}
Cycle 1:
{{{reward_1}}}
Cycle 2:
{{{reward_2}}}
Cycle 3:
{{{reward_3}}}
Cycle 4:
{{{reward_4}}}
Cycle 5:
{{{reward_5}}}
Cycle 6:
{{{reward_6}}}
Cycle 7:
{{{reward_7}}}
Cycle 8:
{{{reward_8}}}
Cycle 9:
{{{reward_9}}}
Cycle 10:
{{{reward_10}}}
Notes:
{{{notes_1}}}
{{{notes_2}}}
{{{notes_3}}}
{{{notes_4}}}
{{{notes_5}}}
Note: All
Tapasco Theme Spa Quests are not available yet.
Abyss Hunter Girl Yuri's Quest
Hunter Yuri
Phantom Dame
Quest Start Information
Who?
Where?
Conditions
Cycles
Hunter Yuri
Gate of Abyss
Level 1000+
5
Monster Information
Who?
Where?
How Many?
Time Limit
Phantom Dame
Abyss Field 2 - Living Boneyard
30
15 minutes
Quest Experience
XP
TM XP
7201684
1059935
Rewards
Cycle 1:
Cycle 2:
Cycle 3:
Cycle 4:
Cycle 5:
Notes
{{{notes_2}}}
{{{notes_3}}}
{{{notes_4}}}
{{{notes_5}}}
Abyss Assistant Hunter's Quest
Assistant Hunter
Skelefish King
Quest Start Information
Who?
Where?
Conditions
Cycles
Assistant Hunter
Gate of Abyss
Level 1000+, have completed Hunter Yuri - Abyss Hunter Girl Yuri's Quest
5
Monster Information
Who?
Where?
How Many?
Time Limit
Skelefish King
Abyss Field 4 - The Crushing Depths
30
15 minutes
Quest Experience
XP
TM XP
4383730
2289945
Rewards
Cycle 1:
Cycle 2:
Cycle 3:
Cycle 4:
Cycle 5:
Notes
{{{notes_2}}}
{{{notes_3}}}
{{{notes_4}}}
{{{notes_5}}}
Special Octopus Dish
NPC: Sophia
Location:
Abyss Field 1 - The Valley Mouth
Condition:
Request:
5x
Giant Octopus Leg
1x
Golden Concotion
{{{request_3}}}
{{{request_4}}}
{{{request_5}}}
Quest Cycles: 5
XP: 12602326
TM XP: 0
Cycle 1:
Cycle 2:
Cycle 3:
Cycle 4:
Cycle 5:
1x
Abyss Sticker
Cycle 1:
{{{reward_1}}}
Cycle 2:
{{{reward_2}}}
Cycle 3:
{{{reward_3}}}
Cycle 4:
{{{reward_4}}}
Cycle 5:
{{{reward_5}}}
Cycle 6:
{{{reward_6}}}
Cycle 7:
{{{reward_7}}}
Cycle 8:
{{{reward_8}}}
Cycle 9:
{{{reward_9}}}
Cycle 10:
{{{reward_10}}}
Notes:
{{{notes_2}}}
{{{notes_3}}}
{{{notes_4}}}
{{{notes_5}}}
Monkey T's Request (12)
NPC: Monkey T
Location:
Abyss Field 1 - The Valley Mouth
Condition:
Request:
10x
Eternal Bestial Grass
{{{request_2}}}
{{{request_3}}}
{{{request_4}}}
{{{request_5}}}
Quest Cycles: 25
XP: 0
TM XP: 3715343
Cycle 1~25:
{{{reward_custom_2_text}}}:
{{{reward_custom_2}}}
{{{reward_custom_3_text}}}:
{{{reward_custom_3}}}
{{{reward_custom_4_text}}}:
{{{reward_custom_4}}}
{{{reward_custom_5_text}}}:
{{{reward_custom_5}}}
Cycle 1:
{{{reward_1}}}
Cycle 2:
{{{reward_2}}}
Cycle 3:
{{{reward_3}}}
Cycle 4:
{{{reward_4}}}
Cycle 5:
{{{reward_5}}}
Cycle 6:
{{{reward_6}}}
Cycle 7:
{{{reward_7}}}
Cycle 8:
{{{reward_8}}}
Cycle 9:
{{{reward_9}}}
Cycle 10:
{{{reward_10}}}
Notes:
{{{notes_2}}}
{{{notes_3}}}
{{{notes_4}}}
{{{notes_5}}}
Projection Lesson (1)
NPC: Copyfish DomDom
Location:
Abyss Field 1 - The Valley Mouth
Condition:
Request:
1x
Blank Scroll
3x
Waterproof Ink
{{{request_3}}}
{{{request_4}}}
{{{request_5}}}
Quest Cycles: 5
XP: 12602326
TM XP: 0
Cycle 1:
1x 5 Mil Galder Check
Cycle 2:
1x 5 Mil Galder Check
Cycle 3:
1x 5 Mil Galder Check
Cycle 4:
1x 5 Mil Galder Check
Cycle 5:
1x
Abyss Sticker
Cycle 1:
{{{reward_1}}}
Cycle 2:
{{{reward_2}}}
Cycle 3:
{{{reward_3}}}
Cycle 4:
{{{reward_4}}}
Cycle 5:
{{{reward_5}}}
Cycle 6:
{{{reward_6}}}
Cycle 7:
{{{reward_7}}}
Cycle 8:
{{{reward_8}}}
Cycle 9:
{{{reward_9}}}
Cycle 10:
{{{reward_10}}}
Notes:
Blank Scroll is dropped by
Krybeth and
Waterproof Ink is dropped by
Skelefish .
5 Mil Galder Check Star Gazer Stella in Megalopolis Shop for level 900 stones/elemental crystals or sell them to other players.
{{{notes_3}}}
{{{notes_4}}}
{{{notes_5}}}
Projection Lesson (2)
NPC: Copyfish DomDom
Location:
Abyss Field 1 - The Valley Mouth
Condition:
Request:
1x
Art of Projection (1)
3x
Krybeth Tooth
{{{request_3}}}
{{{request_4}}}
{{{request_5}}}
Quest Cycles: 5
XP: 12602326
TM XP: 0
Cycle 1:
and 1x
Art of Projection (1)
Cycle 2:
and 1x
Art of Projection (1)
Cycle 3:
and 1x
Art of Projection (1)
Cycle 4:
and 1x
Art of Projection (1)
Cycle 5:
1x
Abyss Sticker
Cycle 1:
{{{reward_1}}}
Cycle 2:
{{{reward_2}}}
Cycle 3:
{{{reward_3}}}
Cycle 4:
{{{reward_4}}}
Cycle 5:
{{{reward_5}}}
Cycle 6:
{{{reward_6}}}
Cycle 7:
{{{reward_7}}}
Cycle 8:
{{{reward_8}}}
Cycle 9:
{{{reward_9}}}
Cycle 10:
{{{reward_10}}}
Notes:
{{{notes_2}}}
{{{notes_3}}}
{{{notes_4}}}
{{{notes_5}}}
Mermaid Babe's Ocean Diet (1)
NPC: Mermaid Babe
Location:
Abyss Field 2 - Living Boneyard
Condition:
Request:
1x
Golden Concotion
{{{request_2}}}
{{{request_3}}}
{{{request_4}}}
{{{request_5}}}
Quest Cycles: 5
XP: 12602326
TM XP: 0
Cycle 1~5:
{{{reward_custom_2_text}}}:
{{{reward_custom_2}}}
{{{reward_custom_3_text}}}:
{{{reward_custom_3}}}
{{{reward_custom_4_text}}}:
{{{reward_custom_4}}}
{{{reward_custom_5_text}}}:
{{{reward_custom_5}}}
Cycle 1:
{{{reward_1}}}
Cycle 2:
{{{reward_2}}}
Cycle 3:
{{{reward_3}}}
Cycle 4:
{{{reward_4}}}
Cycle 5:
{{{reward_5}}}
Cycle 6:
{{{reward_6}}}
Cycle 7:
{{{reward_7}}}
Cycle 8:
{{{reward_8}}}
Cycle 9:
{{{reward_9}}}
Cycle 10:
{{{reward_10}}}
Notes:
{{{notes_3}}}
{{{notes_4}}}
{{{notes_5}}}
Mermaid Babe's Ocean Diet (2)
NPC: Mermaid Babe
Location:
Abyss Field 2 - Living Boneyard
Condition:
Request:
1x
Sheer Leather Dress
{{{request_2}}}
{{{request_3}}}
{{{request_4}}}
{{{request_5}}}
Quest Cycles: 5
XP: 12602326
TM XP: 0
Cycle 1~4:
50x Repair Powder
Cycle 5:
1x Abyss Sticker
{{{reward_custom_3_text}}}:
{{{reward_custom_3}}}
{{{reward_custom_4_text}}}:
{{{reward_custom_4}}}
{{{reward_custom_5_text}}}:
{{{reward_custom_5}}}
Cycle 1:
{{{reward_1}}}
Cycle 2:
{{{reward_2}}}
Cycle 3:
{{{reward_3}}}
Cycle 4:
{{{reward_4}}}
Cycle 5:
{{{reward_5}}}
Cycle 6:
{{{reward_6}}}
Cycle 7:
{{{reward_7}}}
Cycle 8:
{{{reward_8}}}
Cycle 9:
{{{reward_9}}}
Cycle 10:
{{{reward_10}}}
Notes:
{{{notes_3}}}
{{{notes_4}}}
{{{notes_5}}}
Fashion Ideas for Jill Jelly Head
NPC: Louis Bitton
Location:
Abyss Field 3 - The Dark Hills
Condition:
Request:
10x
Sea Whale Fluff
2x
Sea Whale Leather
2x
Sea Whale Bone
2x
Sea Whale Sinew
{{{request_5}}}
Quest Cycles: 5
XP: 12602326
TM XP: 0
Cycle 1~3:
1x
Sheer Leather Dress
Cycle 4:
1x
Sheer Leather Dress
Cycle 5:
1x
Abyss Sticker
{{{reward_custom_4_text}}}:
{{{reward_custom_4}}}
{{{reward_custom_5_text}}}:
{{{reward_custom_5}}}
Cycle 1:
{{{reward_1}}}
Cycle 2:
{{{reward_2}}}
Cycle 3:
{{{reward_3}}}
Cycle 4:
{{{reward_4}}}
Cycle 5:
{{{reward_5}}}
Cycle 6:
{{{reward_6}}}
Cycle 7:
{{{reward_7}}}
Cycle 8:
{{{reward_8}}}
Cycle 9:
{{{reward_9}}}
Cycle 10:
{{{reward_10}}}
Notes:
The Best Kind of Fuel
NPC: Marinel
Location:
Abyss Field 2 - Living Boneyard
Condition:
Request:
3x
Hydelite
{{{request_2}}}
{{{request_3}}}
{{{request_4}}}
{{{request_5}}}
Quest Cycles: 5
XP: 12602326
TM XP: 0
Cycle 1~4:
1x Halloween Box 2019
Cycle 5:
1x
Abyss Sticker
{{{reward_custom_3_text}}}:
{{{reward_custom_3}}}
{{{reward_custom_4_text}}}:
{{{reward_custom_4}}}
{{{reward_custom_5_text}}}:
{{{reward_custom_5}}}
Cycle 1:
{{{reward_1}}}
Cycle 2:
{{{reward_2}}}
Cycle 3:
{{{reward_3}}}
Cycle 4:
{{{reward_4}}}
Cycle 5:
{{{reward_5}}}
Cycle 6:
{{{reward_6}}}
Cycle 7:
{{{reward_7}}}
Cycle 8:
{{{reward_8}}}
Cycle 9:
{{{reward_9}}}
Cycle 10:
{{{reward_10}}}
Notes:
Hydelite is drilled in Abyss fields.
{{{notes_3}}}
{{{notes_4}}}
{{{notes_5}}}
Black Box of the Santa Noriho
NPC: Captain Stan
Location:
Abyss Field 3 - The Dark Hills
Condition:
Request:
5x Black Box JJ-00H
{{{request_2}}}
{{{request_3}}}
{{{request_4}}}
{{{request_5}}}
Quest Cycles: 5
XP: 12602326
TM XP: 0
Cycle 1~4:
Cycle 5:
1x
Abyss Sticker
{{{reward_custom_3_text}}}:
{{{reward_custom_3}}}
{{{reward_custom_4_text}}}:
{{{reward_custom_4}}}
{{{reward_custom_5_text}}}:
{{{reward_custom_5}}}
Cycle 1:
{{{reward_1}}}
Cycle 2:
{{{reward_2}}}
Cycle 3:
{{{reward_3}}}
Cycle 4:
{{{reward_4}}}
Cycle 5:
{{{reward_5}}}
Cycle 6:
{{{reward_6}}}
Cycle 7:
{{{reward_7}}}
Cycle 8:
{{{reward_8}}}
Cycle 9:
{{{reward_9}}}
Cycle 10:
{{{reward_10}}}
Notes:
Black Box JJ-00H is drilled in Abyss Fields.
Do not confuse Black Box JJ-00H Black Box L-SH01 Black Box L-SH01
{{{notes_4}}}
{{{notes_5}}}
Potion of Bravery
NPC: Jill Jelly Head
Location:
Abyss Town - Platonia
Condition:
Request:
3x
Sea Whale Sinew
3x
Giant Octopus Leg
{{{request_3}}}
{{{request_4}}}
{{{request_5}}}
Quest Cycles: 3
XP: 12602326
TM XP: 0
Cycle 1~2:
Cycle 3:
and 1x
Abyss Sticker
{{{reward_custom_3_text}}}:
{{{reward_custom_3}}}
{{{reward_custom_4_text}}}:
{{{reward_custom_4}}}
{{{reward_custom_5_text}}}:
{{{reward_custom_5}}}
Cycle 1:
{{{reward_1}}}
Cycle 2:
{{{reward_2}}}
Cycle 3:
{{{reward_3}}}
Cycle 4:
{{{reward_4}}}
Cycle 5:
{{{reward_5}}}
Cycle 6:
{{{reward_6}}}
Cycle 7:
{{{reward_7}}}
Cycle 8:
{{{reward_8}}}
Cycle 9:
{{{reward_9}}}
Cycle 10:
{{{reward_10}}}
Notes:
Sea Whale Sinew and
Giant Octopus Leg are drilled in Abyss fields.
{{{notes_3}}}
{{{notes_4}}}
{{{notes_5}}}
Granpa Jelly Head's Worries
NPC: Granpa Jelly Head
Location:
Abyss Town - Platonia
Condition:
Request:
5x
Blank Scroll
3x
Waterproof Ink
{{{request_3}}}
{{{request_4}}}
{{{request_5}}}
Quest Cycles: 3
XP: 12602326
TM XP: 0
Cycle 1~2:
Cycle 3:
and 1x
Abyss Sticker
{{{reward_custom_3_text}}}:
{{{reward_custom_3}}}
{{{reward_custom_4_text}}}:
{{{reward_custom_4}}}
{{{reward_custom_5_text}}}:
{{{reward_custom_5}}}
Cycle 1:
{{{reward_1}}}
Cycle 2:
{{{reward_2}}}
Cycle 3:
{{{reward_3}}}
Cycle 4:
{{{reward_4}}}
Cycle 5:
{{{reward_5}}}
Cycle 6:
{{{reward_6}}}
Cycle 7:
{{{reward_7}}}
Cycle 8:
{{{reward_8}}}
Cycle 9:
{{{reward_9}}}
Cycle 10:
{{{reward_10}}}
Notes:
Blank Scroll is dropped by
Krybeth and
Waterproof Ink is dropped by
Skelefish .
{{{notes_3}}}
{{{notes_4}}}
{{{notes_5}}}
Dr. Jelly Head's Research (1)
NPC: Dr. Jelly Head
Location:
Abyss Town - Platonia
Condition:
Request:
5x
Random Part
{{{request_2}}}
{{{request_3}}}
{{{request_4}}}
{{{request_5}}}
Quest Cycles: 5
XP: 12602326
TM XP: 0
Cycle 1~4:
Cycle 5:
and 1x
Abyss Sticker
{{{reward_custom_3_text}}}:
{{{reward_custom_3}}}
{{{reward_custom_4_text}}}:
{{{reward_custom_4}}}
{{{reward_custom_5_text}}}:
{{{reward_custom_5}}}
Cycle 1:
{{{reward_1}}}
Cycle 2:
{{{reward_2}}}
Cycle 3:
{{{reward_3}}}
Cycle 4:
{{{reward_4}}}
Cycle 5:
{{{reward_5}}}
Cycle 6:
{{{reward_6}}}
Cycle 7:
{{{reward_7}}}
Cycle 8:
{{{reward_8}}}
Cycle 9:
{{{reward_9}}}
Cycle 10:
{{{reward_10}}}
Notes:
Random Part is drilled in Abyss fields.
{{{notes_3}}}
{{{notes_4}}}
{{{notes_5}}}
Dr. Jelly Head's Research (2)
NPC: Dr. Jelly Head
Location:
Abyss Town - Platonia
Condition:
Request:
5x
Random Bearing
{{{request_2}}}
{{{request_3}}}
{{{request_4}}}
{{{request_5}}}
Quest Cycles: 5
XP: 12602326
TM XP: 0
Cycle 1~4:
1x 5 Mil Galder Check
Cycle 5:
1x 5 Mil Galder Check
and 1x
Abyss Sticker
{{{reward_custom_3_text}}}:
{{{reward_custom_3}}}
{{{reward_custom_4_text}}}:
{{{reward_custom_4}}}
{{{reward_custom_5_text}}}:
{{{reward_custom_5}}}
Cycle 1:
{{{reward_1}}}
Cycle 2:
{{{reward_2}}}
Cycle 3:
{{{reward_3}}}
Cycle 4:
{{{reward_4}}}
Cycle 5:
{{{reward_5}}}
Cycle 6:
{{{reward_6}}}
Cycle 7:
{{{reward_7}}}
Cycle 8:
{{{reward_8}}}
Cycle 9:
{{{reward_9}}}
Cycle 10:
{{{reward_10}}}
Notes:
Random Bearing is drilled in Abyss fields.
5 Mil Galder Check Star Gazer Stella for level 900 stones/elemental crystals or sell it to other players.
{{{notes_4}}}
{{{notes_5}}}
Dark Spirit Punishment 12
Shaman Girl Jia
Shadow Krybeth
Quest Start Information
Who?
Where?
Conditions
Cycles
Shaman Girl Jia
Abyss Town - Platonia
Level 1500+, using Mind's Eye
1 (Daily)
Monster Information
Who?
Where?
How Many?
Time Limit
Shadow Krybeth
Abyss Field 3 - The Dark Hills
3
11:00
Quest Experience
XP
TM XP
12602326
0
Rewards
Cycle 1:
Cycle 2:
{{{reward_2}}}
Cycle 3:
{{{reward_3}}}
Cycle 4:
{{{reward_4}}}
Cycle 5:
{{{reward_5}}}
Notes
Quest repeatable daily, server resets at 12 AM GMT+0
{{{notes_2}}}
{{{notes_3}}}
{{{notes_4}}}
{{{notes_5}}}
Enhanced Story Quests [ ]
Prove Your Spirit
NPC: Bunny Maid
Location:
Coral Town - Blooming Cora
Condition:
Any, have completed Bunny Maid - Prove Your Spirit!
Request:
2x
Baby Carrot
{{{request_2}}}
{{{request_3}}}
{{{request_4}}}
{{{request_5}}}
Quest Cycles: 1
XP: 2739
TM XP: 2739
Reward:
Devil Wings and Tail + Ghostly Whisper Aura
{{{reward_custom_2_text}}}:
{{{reward_custom_2}}}
{{{reward_custom_3_text}}}:
{{{reward_custom_3}}}
{{{reward_custom_4_text}}}:
{{{reward_custom_4}}}
{{{reward_custom_5_text}}}:
{{{reward_custom_5}}}
Cycle 1:
{{{reward_1}}}
Cycle 2:
{{{reward_2}}}
Cycle 3:
{{{reward_3}}}
Cycle 4:
{{{reward_4}}}
Cycle 5:
{{{reward_5}}}
Cycle 6:
{{{reward_6}}}
Cycle 7:
{{{reward_7}}}
Cycle 8:
{{{reward_8}}}
Cycle 9:
{{{reward_9}}}
Cycle 10:
{{{reward_10}}}
Notes:
Baby Carrots can be found by hunting Torobbies in Coral Beach Field 1
{{{notes_2}}}
{{{notes_3}}}
{{{notes_4}}}
{{{notes_5}}}
Helping Others
NPC: Bunny Maid
Location:
Coral Town - Blooming Cora
Condition:
Any, have completed Bunny Maid - Prove Your Spirit!
Request:
Find and talk to Winnie
{{{request_2}}}
{{{request_3}}}
{{{request_4}}}
{{{request_5}}}
Quest Cycles: 1
XP: 2739
TM XP: 2739
Cycle 1:
1x
Ice Cone 1x
Levitation Charm
{{{reward_custom_2_text}}}:
{{{reward_custom_2}}}
{{{reward_custom_3_text}}}:
{{{reward_custom_3}}}
{{{reward_custom_4_text}}}:
{{{reward_custom_4}}}
{{{reward_custom_5_text}}}:
{{{reward_custom_5}}}
Cycle 1:
{{{reward_1}}}
Cycle 2:
{{{reward_2}}}
Cycle 3:
{{{reward_3}}}
Cycle 4:
{{{reward_4}}}
Cycle 5:
{{{reward_5}}}
Cycle 6:
{{{reward_6}}}
Cycle 7:
{{{reward_7}}}
Cycle 8:
{{{reward_8}}}
Cycle 9:
{{{reward_9}}}
Cycle 10:
{{{reward_10}}}
Notes:
Winnie is to the northwest of Bunny Maid, on the way to the portal to Coral Beach Field 1
{{{notes_2}}}
{{{notes_3}}}
{{{notes_4}}}
{{{notes_5}}}
Bean's Request
NPC: Lifeguard Bean
Location:
Coral Beach Field 3 - Sunny Beach
Condition:
Level 1+, have completed Tinnie - Tinnie's Request 2
Request:
5x
Cool Ice
{{{request_2}}}
{{{request_3}}}
{{{request_4}}}
{{{request_5}}}
Quest Cycles: 1
XP: 32928
TM XP: 32928
Cycle 1:
1x
Power Amulet 1x
Magic Amulet
{{{reward_custom_2_text}}}:
{{{reward_custom_2}}}
{{{reward_custom_3_text}}}:
{{{reward_custom_3}}}
{{{reward_custom_4_text}}}:
{{{reward_custom_4}}}
{{{reward_custom_5_text}}}:
{{{reward_custom_5}}}
Cycle 1:
{{{reward_1}}}
Cycle 2:
{{{reward_2}}}
Cycle 3:
{{{reward_3}}}
Cycle 4:
{{{reward_4}}}
Cycle 5:
{{{reward_5}}}
Cycle 6:
{{{reward_6}}}
Cycle 7:
{{{reward_7}}}
Cycle 8:
{{{reward_8}}}
Cycle 9:
{{{reward_9}}}
Cycle 10:
{{{reward_10}}}
Notes:
{{{notes_2}}}
{{{notes_3}}}
{{{notes_4}}}
{{{notes_5}}}
Master Drilling!
NPC: Driller Marky
Location:
Gate of Desert Beach
Condition:
Request:
2x
Tanning Oil
{{{request_2}}}
{{{request_3}}}
{{{request_4}}}
{{{request_5}}}
Quest Cycles: 1
XP: 21763
TM XP: 21763
Cycle 1:
1x
Driller Boy 1x Drilling for Dummies
{{{reward_custom_2_text}}}:
{{{reward_custom_2}}}
{{{reward_custom_3_text}}}:
{{{reward_custom_3}}}
{{{reward_custom_4_text}}}:
{{{reward_custom_4}}}
{{{reward_custom_5_text}}}:
{{{reward_custom_5}}}
Cycle 1:
{{{reward_1}}}
Cycle 2:
{{{reward_2}}}
Cycle 3:
{{{reward_3}}}
Cycle 4:
{{{reward_4}}}
Cycle 5:
{{{reward_5}}}
Cycle 6:
{{{reward_6}}}
Cycle 7:
{{{reward_7}}}
Cycle 8:
{{{reward_8}}}
Cycle 9:
{{{reward_9}}}
Cycle 10:
{{{reward_10}}}
Notes:
Tanning Oil is drilled in Gate of Desert Beach.
Driller Boy is used to make your character automatically drill.
{{{notes_3}}}
{{{notes_4}}}
{{{notes_5}}}
Don's Push - 4th Stage
NPC: Officer Robert
Location:
Beach Town - Paradise
Condition:
Have completed Officer Robert - Don's Push - 3rd Stage
Request:
1x Refining Guide
and 1x Refined Wooden Sword
{{{request_2}}}
{{{request_3}}}
{{{request_4}}}
{{{request_5}}}
Quest Cycles: 1
XP: 87054
TM XP: 43527
Cycle 1:
and 25x Star Card No. 7 Pack
{{{reward_custom_2_text}}}:
{{{reward_custom_2}}}
{{{reward_custom_3_text}}}:
{{{reward_custom_3}}}
{{{reward_custom_4_text}}}:
{{{reward_custom_4}}}
{{{reward_custom_5_text}}}:
{{{reward_custom_5}}}
Cycle 1:
{{{reward_1}}}
Cycle 2:
{{{reward_2}}}
Cycle 3:
{{{reward_3}}}
Cycle 4:
{{{reward_4}}}
Cycle 5:
{{{reward_5}}}
Cycle 6:
{{{reward_6}}}
Cycle 7:
{{{reward_7}}}
Cycle 8:
{{{reward_8}}}
Cycle 9:
{{{reward_9}}}
Cycle 10:
{{{reward_10}}}
Notes:
Refining Guide
{{{notes_2}}}
{{{notes_3}}}
{{{notes_4}}}
{{{notes_5}}}
Rosaline's Document
NPC: Rosaline Gracia
Location:
Megalopolis Square
Condition:
Level 45+, have completed Love Hunter Robin - Necklace's Owner
Request:
1x
Honey Tea 1x Nefertiti's Portrait
{{{request_2}}}
{{{request_3}}}
{{{request_4}}}
{{{request_5}}}
Quest Cycles: 1
XP: 1288065
TM XP: 606262
Cycle 1:
{{{reward_custom_2_text}}}:
{{{reward_custom_2}}}
{{{reward_custom_3_text}}}:
{{{reward_custom_3}}}
{{{reward_custom_4_text}}}:
{{{reward_custom_4}}}
{{{reward_custom_5_text}}}:
{{{reward_custom_5}}}
Cycle 1:
{{{reward_1}}}
Cycle 2:
{{{reward_2}}}
Cycle 3:
{{{reward_3}}}
Cycle 4:
{{{reward_4}}}
Cycle 5:
{{{reward_5}}}
Cycle 6:
{{{reward_6}}}
Cycle 7:
{{{reward_7}}}
Cycle 8:
{{{reward_8}}}
Cycle 9:
{{{reward_9}}}
Cycle 10:
{{{reward_10}}}
Notes:
Honey Tea is obtained by compounding 1x
Honey + 2x
Royal Jelly + 2x
Distilled Water with Compounder Nate in Megalopolis Square.
Royal Jelly and
Honey are dropped by
Forest Wasp File:Monster Forest Wasp Idle.gif and
Distilled Water is sold by Item Girl.
Nefertiti's Portriat Old Artist - Old Artist's Needs .
End of Episode 1: Chapter 1
{{{notes_4}}}
{{{notes_5}}}
Box's Identity
NPC: Indiana John
Location:
Caballa Relics Dungeon 1
Condition:
Level 45+, have completed Indiana John - Weird Box
Request:
2x
Lamplight 1x
Doc from Weird Box
{{{request_2}}}
{{{request_3}}}
{{{request_4}}}
{{{request_5}}}
Quest Cycles: 1
XP: 1656480
TM XP: 1884952
Cycle 1:
{{{reward_custom_2_text}}}:
{{{reward_custom_2}}}
{{{reward_custom_3_text}}}:
{{{reward_custom_3}}}
{{{reward_custom_4_text}}}:
{{{reward_custom_4}}}
{{{reward_custom_5_text}}}:
{{{reward_custom_5}}}
Cycle 1:
{{{reward_1}}}
Cycle 2:
{{{reward_2}}}
Cycle 3:
{{{reward_3}}}
Cycle 4:
{{{reward_4}}}
Cycle 5:
{{{reward_5}}}
Cycle 6:
{{{reward_6}}}
Cycle 7:
{{{reward_7}}}
Cycle 8:
{{{reward_8}}}
Cycle 9:
{{{reward_9}}}
Cycle 10:
{{{reward_10}}}
Notes:
Lamplight is dropped by
Naranjo and
Doc from Weird Box is obtained from
Weird Box - VENDETTA .
End of Episode 1: Chapter 2
{{{notes_3}}}
{{{notes_4}}}
{{{notes_5}}}
Fairy's Favor
NPC: Fairy Nono
Location:
Path to Mermaid Palace 2
Condition:
Level 52+, have completed Fairy Nono - Fairy in a Harkon and have Volcano Water Silk Handkerchief Special Polisher
Request:
1x
Transparent Medicine
1x
Nono's Note
{{{request_3}}}
{{{request_4}}}
{{{request_5}}}
Quest Cycles: 1
XP: 1818198
TM XP: 2146586
Cycle 1:
1x Noxx Wig
1x Little Ringoo
{{{reward_custom_2_text}}}:
{{{reward_custom_2}}}
{{{reward_custom_3_text}}}:
{{{reward_custom_3}}}
{{{reward_custom_4_text}}}:
{{{reward_custom_4}}}
{{{reward_custom_5_text}}}:
{{{reward_custom_5}}}
Cycle 1:
{{{reward_1}}}
Cycle 2:
{{{reward_2}}}
Cycle 3:
{{{reward_3}}}
Cycle 4:
{{{reward_4}}}
Cycle 5:
{{{reward_5}}}
Cycle 6:
{{{reward_6}}}
Cycle 7:
{{{reward_7}}}
Cycle 8:
{{{reward_8}}}
Cycle 9:
{{{reward_9}}}
Cycle 10:
{{{reward_10}}}
Notes:
Nono's Note Fairy Nono - Fairy in a Harkon
End of Episode 1: Chapter 3
{{{notes_4}}}
{{{notes_5}}}
Episode 2 [ ]
Marx's Sheath
NPC: Blacksmith Marx
Location:
Gate of Mermaid Dungeon
Condition:
Condition: Level 80+, have Don Giuvanni - Knife's New Owner in quest log
Request:
3x Black Pearl , 3x Pearl , 3x Sturdy Scales
{{{request_2}}}
{{{request_3}}}
{{{request_4}}}
{{{request_5}}}
Quest Cycles: 1
XP: 506,800
TM XP: 967,950
Cycle 1:
1x Scabbard
1x Blacksmith Marx Card
{{{reward_custom_2_text}}}:
{{{reward_custom_2}}}
{{{reward_custom_3_text}}}:
{{{reward_custom_3}}}
{{{reward_custom_4_text}}}:
{{{reward_custom_4}}}
{{{reward_custom_5_text}}}:
{{{reward_custom_5}}}
Cycle 1:
{{{reward_1}}}
Cycle 2:
{{{reward_2}}}
Cycle 3:
{{{reward_3}}}
Cycle 4:
{{{reward_4}}}
Cycle 5:
{{{reward_5}}}
Cycle 6:
{{{reward_6}}}
Cycle 7:
{{{reward_7}}}
Cycle 8:
{{{reward_8}}}
Cycle 9:
{{{reward_9}}}
Cycle 10:
{{{reward_10}}}
Notes:
Black Pearl ,
Pearl are drilled in Mermaid Palace Fields and Mermaid Dungeon.
Sturdy Scales is dropped from
Fish Guardian Tink in Mermaid Palace Field 3.
{{{notes_2}}}
{{{notes_3}}}
{{{notes_4}}}
{{{notes_5}}}
Writing on the Knife
NPC: Don Giuvanni
Condition:
Level 80+, have completed Kahlihara - The Sword Deal , can only be done at nighttime.
Request:
1x Decoded Document
{{{request_2}}}
{{{request_3}}}
{{{request_4}}}
{{{request_5}}}
Quest Cycles: 1
XP: 7095200
TM XP: 13551300
Cycle 1:
{{{reward_custom_2_text}}}:
{{{reward_custom_2}}}
{{{reward_custom_3_text}}}:
{{{reward_custom_3}}}
{{{reward_custom_4_text}}}:
{{{reward_custom_4}}}
{{{reward_custom_5_text}}}:
{{{reward_custom_5}}}
Cycle 1:
{{{reward_1}}}
Cycle 2:
{{{reward_2}}}
Cycle 3:
{{{reward_3}}}
Cycle 4:
{{{reward_4}}}
Cycle 5:
{{{reward_5}}}
Cycle 6:
{{{reward_6}}}
Cycle 7:
{{{reward_7}}}
Cycle 8:
{{{reward_8}}}
Cycle 9:
{{{reward_9}}}
Cycle 10:
{{{reward_10}}}
Notes:
Decoded Document Indiana John - Clay Tablet Discovered .
End of Episode 2: Chapter 1
Use Cruise Ticket
{{{notes_4}}}
{{{notes_5}}}
Gift From La Fimmel
NPC: Bard La Fimmel
Location:
Gate of Mirage Island
Condition:
Level 80+, have completed Bard La Fimmel - Incense of Flame 2
Request:
5x
Moonlight Coral
5x
Whale Baleen
{{{request_3}}}
{{{request_4}}}
{{{request_5}}}
Quest Cycles: 1
XP: 7095200
TM XP: 13551300
Cycle 1:
{{{reward_custom_2_text}}}:
{{{reward_custom_2}}}
{{{reward_custom_3_text}}}:
{{{reward_custom_3}}}
{{{reward_custom_4_text}}}:
{{{reward_custom_4}}}
{{{reward_custom_5_text}}}:
{{{reward_custom_5}}}
Cycle 1:
{{{reward_1}}}
Cycle 2:
{{{reward_2}}}
Cycle 3:
{{{reward_3}}}
Cycle 4:
{{{reward_4}}}
Cycle 5:
{{{reward_5}}}
Cycle 6:
{{{reward_6}}}
Cycle 7:
{{{reward_7}}}
Cycle 8:
{{{reward_8}}}
Cycle 9:
{{{reward_9}}}
Cycle 10:
{{{reward_10}}}
Notes:
End of Chapter 2: Episode 2
{{{notes_3}}}
{{{notes_4}}}
{{{notes_5}}}
Final Act, Waiting
NPC: Nefertiti
Location:
Mirage Island Dungeon 1 - Ocean's End
Condition:
Level 80+, have completed Lachesis - Act 3 Scene 2, Recall of Spirit
Request:
1x
Cursed Scroll
1x
Blessed Scroll
1x
Dark Earth Fate Necklace
{{{request_4}}}
{{{request_5}}}
Quest Cycles: 1
XP: 7095200
TM XP: 13551300
Cycle 1:
1x Spirit Head
{{{reward_custom_2_text}}}:
{{{reward_custom_2}}}
{{{reward_custom_3_text}}}:
{{{reward_custom_3}}}
{{{reward_custom_4_text}}}:
{{{reward_custom_4}}}
{{{reward_custom_5_text}}}:
{{{reward_custom_5}}}
Cycle 1:
{{{reward_1}}}
Cycle 2:
{{{reward_2}}}
Cycle 3:
{{{reward_3}}}
Cycle 4:
{{{reward_4}}}
Cycle 5:
{{{reward_5}}}
Cycle 6:
{{{reward_6}}}
Cycle 7:
{{{reward_7}}}
Cycle 8:
{{{reward_8}}}
Cycle 9:
{{{reward_9}}}
Cycle 10:
{{{reward_10}}}
Notes:
Cursed Scroll is obtained by completing
Clotho - Act 1 Scene 4, Curse of Moirae ,
Blessed Scroll is obtained by completing
Lachesis - Act 3 Scene 2, Recall of Spirit , and
Dark Earth Fate Necklace is obtained by completing
Nefertiti - Act 3 Scene 1, Death of Enkicladus .
End of Episode 2: Chapter 3.
{{{notes_3}}}
{{{notes_4}}}
{{{notes_5}}}
Episode 3 [ ]
Amos' Orders
NPC: Chief Architect Amos
Location:
Mirage Island Field 4 - Alteo Construction Site
Condition:
Request:
1x
Signed Document 4
{{{request_2}}}
{{{request_3}}}
{{{request_4}}}
{{{request_5}}}
Quest Cycles: 1
XP: 2593183
TM XP: 969261
Cycle 1:
2x Gold Pig Statue
{{{reward_custom_2_text}}}:
{{{reward_custom_2}}}
{{{reward_custom_3_text}}}:
{{{reward_custom_3}}}
{{{reward_custom_4_text}}}:
{{{reward_custom_4}}}
{{{reward_custom_5_text}}}:
{{{reward_custom_5}}}
Cycle 1:
{{{reward_1}}}
Cycle 2:
{{{reward_2}}}
Cycle 3:
{{{reward_3}}}
Cycle 4:
{{{reward_4}}}
Cycle 5:
{{{reward_5}}}
Cycle 6:
{{{reward_6}}}
Cycle 7:
{{{reward_7}}}
Cycle 8:
{{{reward_8}}}
Cycle 9:
{{{reward_9}}}
Cycle 10:
{{{reward_10}}}
Notes:
Signed Document 4 is obtained from
Sue - Hard Job Pt. 4 Transfer Gems .
Alteo Passport is used to enter the Alteo Empire, talk to Chief Architect Amos to enter.
Unlike Mirage Island which can be entered anytime as long as you have the Cruise Ticket, this quest will reset after rebirth meaning even if you have the Alteo Passport, you will have to repeat this chapter to re-enter the Alteo Empire.
End of Episode 3, Chapter 1
{{{notes_5}}}
Reunion with the Princess
NPC: Nefertiti
Location:
Mirage Island Field 6 - Water Garden
Condition:
Level 130+, have Proof of a Hero
Request:
1x Morgos's Message
{{{request_2}}}
{{{request_3}}}
{{{request_4}}}
{{{request_5}}}
Quest Cycles: 1
XP: 5186367
TM XP: 1938522
Cycle 1:
{{{reward_custom_2_text}}}:
{{{reward_custom_2}}}
{{{reward_custom_3_text}}}:
{{{reward_custom_3}}}
{{{reward_custom_4_text}}}:
{{{reward_custom_4}}}
{{{reward_custom_5_text}}}:
{{{reward_custom_5}}}
Cycle 1:
{{{reward_1}}}
Cycle 2:
{{{reward_2}}}
Cycle 3:
{{{reward_3}}}
Cycle 4:
{{{reward_4}}}
Cycle 5:
{{{reward_5}}}
Cycle 6:
{{{reward_6}}}
Cycle 7:
{{{reward_7}}}
Cycle 8:
{{{reward_8}}}
Cycle 9:
{{{reward_9}}}
Cycle 10:
{{{reward_10}}}
Notes:
Morgos's Message Curator Morgos - Hyper Mind Control .
End of Episode 3, Chapter 2.
{{{notes_4}}}
{{{notes_5}}}
Don Cavalier's Proposal
NPC: Don Cavalier
Location:
Hologram Chamber
Condition:
Level 130+, have completed Officer Robert - Robert the Spy
Request:
1x
Earthen Fate Necklace
{{{request_2}}}
{{{request_3}}}
{{{request_4}}}
{{{request_5}}}
Quest Cycles: 1
XP: 11113644
TM XP: 4153977
Cycle 1:
1x Lucan
{{{reward_custom_2_text}}}:
{{{reward_custom_2}}}
{{{reward_custom_3_text}}}:
{{{reward_custom_3}}}
{{{reward_custom_4_text}}}:
{{{reward_custom_4}}}
{{{reward_custom_5_text}}}:
{{{reward_custom_5}}}
Cycle 1:
{{{reward_1}}}
Cycle 2:
{{{reward_2}}}
Cycle 3:
{{{reward_3}}}
Cycle 4:
{{{reward_4}}}
Cycle 5:
{{{reward_5}}}
Cycle 6:
{{{reward_6}}}
Cycle 7:
{{{reward_7}}}
Cycle 8:
{{{reward_8}}}
Cycle 9:
{{{reward_9}}}
Cycle 10:
{{{reward_10}}}
Notes:
Earthen Fate Necklace is obtained from completing
Spirit of Nefertiti - Spirit Nefertiti's Message .
Enter the Hologram Chamber by using a Hologram Port Officer Robert - Robert the Spy
Enter of Episode 3, Chapter 3.
{{{notes_4}}}
{{{notes_5}}}
Episode 4 [ ]
Dev K Quest
NPC: Developer K
Location:
Underground Dev Room - Dev Room
Condition:
Request:
1x
Fan Art A
1x
Fan Art B
1x
Fan Art C
1x
Fan Art D
1x
Fan Art E 1x
Fan Art F
Quest Cycles: 1
XP: 5075677
TM XP: 1403525
Cycle 1:
{{{reward_custom_2_text}}}:
{{{reward_custom_2}}}
{{{reward_custom_3_text}}}:
{{{reward_custom_3}}}
{{{reward_custom_4_text}}}:
{{{reward_custom_4}}}
{{{reward_custom_5_text}}}:
{{{reward_custom_5}}}
Cycle 1:
{{{reward_1}}}
Cycle 2:
{{{reward_2}}}
Cycle 3:
{{{reward_3}}}
Cycle 4:
{{{reward_4}}}
Cycle 5:
{{{reward_5}}}
Cycle 6:
{{{reward_6}}}
Cycle 7:
{{{reward_7}}}
Cycle 8:
{{{reward_8}}}
Cycle 9:
{{{reward_9}}}
Cycle 10:
{{{reward_10}}}
Notes:
Fan Art A and
Fan Art B are drilled in Underground Dev Room - Dev Room.
Fan Art C ,
Fan Art D ,
Fan Art E , and
Fan Art F are dropped by
Robber Mole File:Monster Robber Mole Idle.gif .
End of Episode 4, Chapter 1.
{{{notes_3}}}
{{{notes_4}}}
{{{notes_5}}}
Dev Room Urban Legends
NPC: Waste Basket
Location:
Underground Dev Room - Dev Room
Condition:
Request:
100x
Trash
{{{request_2}}}
{{{request_3}}}
{{{request_4}}}
{{{request_5}}}
Quest Cycles: 1
XP: 5075677
TM XP: 1403525
Cycle 1:
{{{reward_custom_2_text}}}:
{{{reward_custom_2}}}
{{{reward_custom_3_text}}}:
{{{reward_custom_3}}}
{{{reward_custom_4_text}}}:
{{{reward_custom_4}}}
{{{reward_custom_5_text}}}:
{{{reward_custom_5}}}
Cycle 1:
{{{reward_1}}}
Cycle 2:
{{{reward_2}}}
Cycle 3:
{{{reward_3}}}
Cycle 4:
{{{reward_4}}}
Cycle 5:
{{{reward_5}}}
Cycle 6:
{{{reward_6}}}
Cycle 7:
{{{reward_7}}}
Cycle 8:
{{{reward_8}}}
Cycle 9:
{{{reward_9}}}
Cycle 10:
{{{reward_10}}}
Notes:
Trash is drilled in Underground Dev Room Passages (higher drilling rate for Trash), Dev Room (has a high drilling rate for Trash), and System Control Room.
End of Episode 4, Chapter 2
{{{notes_3}}}
{{{notes_4}}}
{{{notes_5}}}
Memory Storage Device
NPC: Don Cavalier
Location:
Hologram Chamber
Condition:
Level 1000+, use Hologram Port
Request:
Talk to him
{{{request_2}}}
{{{request_3}}}
{{{request_4}}}
{{{request_5}}}
Quest Cycles: 1
XP: 17764872
TM XP: 4912339
Cycle 1:
1x Squid Daughter
10x Green Ticket
{{{reward_custom_2_text}}}:
{{{reward_custom_2}}}
{{{reward_custom_3_text}}}:
{{{reward_custom_3}}}
{{{reward_custom_4_text}}}:
{{{reward_custom_4}}}
{{{reward_custom_5_text}}}:
{{{reward_custom_5}}}
Cycle 1:
{{{reward_1}}}
Cycle 2:
{{{reward_2}}}
Cycle 3:
{{{reward_3}}}
Cycle 4:
{{{reward_4}}}
Cycle 5:
{{{reward_5}}}
Cycle 6:
{{{reward_6}}}
Cycle 7:
{{{reward_7}}}
Cycle 8:
{{{reward_8}}}
Cycle 9:
{{{reward_9}}}
Cycle 10:
{{{reward_10}}}
Notes:
Use
Hologram Port to teleport to Hologram Chamber.
End of Episode 4, Chapter 3.
{{{notes_3}}}
{{{notes_4}}}
{{{notes_5}}}
Episode 5 [ ]
Don Danihen's Memory
File:Npc Don Danihen.gif
NPC: Don Danihen
Location:
Rosaline's Memory
Condition:
Level 2000+, use Hologram Port
Request:
Talk to him
{{{request_2}}}
{{{request_3}}}
{{{request_4}}}
{{{request_5}}}
Quest Cycles: 1
XP: 17764872
TM XP: 4912339
Cycle 1:
10x Green Ticket
{{{reward_custom_2_text}}}:
{{{reward_custom_2}}}
{{{reward_custom_3_text}}}:
{{{reward_custom_3}}}
{{{reward_custom_4_text}}}:
{{{reward_custom_4}}}
{{{reward_custom_5_text}}}:
{{{reward_custom_5}}}
Cycle 1:
{{{reward_1}}}
Cycle 2:
{{{reward_2}}}
Cycle 3:
{{{reward_3}}}
Cycle 4:
{{{reward_4}}}
Cycle 5:
{{{reward_5}}}
Cycle 6:
{{{reward_6}}}
Cycle 7:
{{{reward_7}}}
Cycle 8:
{{{reward_8}}}
Cycle 9:
{{{reward_9}}}
Cycle 10:
{{{reward_10}}}
Notes:
Use
Hologram Port to teleport to Hologram Chamber.
End of Episode 4, Chapter 3.
{{{notes_3}}}
{{{notes_4}}}
{{{notes_5}}}
Bookcase - Entrance to the Secret Room
Don Cavalier - Encounter
These quests' in-game reward will be updated soon, don't do them until then.
Alteo Empire Survey 1
NPC: Indiana John
Location:
Alteo Empire Field 1 - Secret Garden
Condition:
Level 5000+, have completed Officer Albert - Relics Specialist Researcher
Request:
10x
Old Slate Piece
{{{request_2}}}
{{{request_3}}}
{{{request_4}}}
{{{request_5}}}
Quest Cycles: 1
XP: 7580776
TM XP: 1404191
Cycle 1:
1x Fairy's Fireworks
{{{reward_custom_2_text}}}:
{{{reward_custom_2}}}
{{{reward_custom_3_text}}}:
{{{reward_custom_3}}}
{{{reward_custom_4_text}}}:
{{{reward_custom_4}}}
{{{reward_custom_5_text}}}:
{{{reward_custom_5}}}
Cycle 1:
{{{reward_1}}}
Cycle 2:
{{{reward_2}}}
Cycle 3:
{{{reward_3}}}
Cycle 4:
{{{reward_4}}}
Cycle 5:
{{{reward_5}}}
Cycle 6:
{{{reward_6}}}
Cycle 7:
{{{reward_7}}}
Cycle 8:
{{{reward_8}}}
Cycle 9:
{{{reward_9}}}
Cycle 10:
{{{reward_10}}}
Notes:
Old Slate Piece is drilled in Alteo Empire fields.
{{{notes_2}}}
{{{notes_3}}}
{{{notes_4}}}
{{{notes_5}}}
The Slate's Secret
NPC: Indiana John
Location:
Alteo Empire Field 1 - Secret Garden
Condition:
Request:
1x Unknown Item
{{{request_2}}}
{{{request_3}}}
{{{request_4}}}
{{{request_5}}}
Quest Cycles: 1
XP: 3790388
TM XP: 702095
Cycle 1:
{{{reward_custom_2_text}}}:
{{{reward_custom_2}}}
{{{reward_custom_3_text}}}:
{{{reward_custom_3}}}
{{{reward_custom_4_text}}}:
{{{reward_custom_4}}}
{{{reward_custom_5_text}}}:
{{{reward_custom_5}}}
Cycle 1:
{{{reward_1}}}
Cycle 2:
{{{reward_2}}}
Cycle 3:
{{{reward_3}}}
Cycle 4:
{{{reward_4}}}
Cycle 5:
{{{reward_5}}}
Cycle 6:
{{{reward_6}}}
Cycle 7:
{{{reward_7}}}
Cycle 8:
{{{reward_8}}}
Cycle 9:
{{{reward_9}}}
Cycle 10:
{{{reward_10}}}
Notes:
{{{notes_2}}}
{{{notes_3}}}
{{{notes_4}}}
{{{notes_5}}}
Alteo Empire Survey 2
NPC: Explorer Reina
Location:
Alteo Empire Field 2 - Time Cascade
Condition:
Request:
10x
Shiny Piece
{{{request_2}}}
{{{request_3}}}
{{{request_4}}}
{{{request_5}}}
Quest Cycles: 1
XP: 7580776
TM XP: 1404191
Cycle 1:
20x Kevin's Box
{{{reward_custom_2_text}}}:
{{{reward_custom_2}}}
{{{reward_custom_3_text}}}:
{{{reward_custom_3}}}
{{{reward_custom_4_text}}}:
{{{reward_custom_4}}}
{{{reward_custom_5_text}}}:
{{{reward_custom_5}}}
Cycle 1:
{{{reward_1}}}
Cycle 2:
{{{reward_2}}}
Cycle 3:
{{{reward_3}}}
Cycle 4:
{{{reward_4}}}
Cycle 5:
{{{reward_5}}}
Cycle 6:
{{{reward_6}}}
Cycle 7:
{{{reward_7}}}
Cycle 8:
{{{reward_8}}}
Cycle 9:
{{{reward_9}}}
Cycle 10:
{{{reward_10}}}
Notes:
Shiny Piece is drilled in Alteo Empire fields.
{{{notes_2}}}
{{{notes_3}}}
{{{notes_4}}}
{{{notes_5}}}
Alteo Empire Survey 3
NPC: Explorer Reina
Location:
Alteo Empire Field 2 - Time Cascade
Condition:
Request:
1x
Earth Spirit Stone
1x
Electricity Spirit Stone
1x
Wind Spirit Stone
1x
Water Spirit Stone
{{{request_5}}}
Quest Cycles: 1
XP: 7580776
TM XP: 1404191
Cycle 1:
{{{reward_custom_2_text}}}:
{{{reward_custom_2}}}
{{{reward_custom_3_text}}}:
{{{reward_custom_3}}}
{{{reward_custom_4_text}}}:
{{{reward_custom_4}}}
{{{reward_custom_5_text}}}:
{{{reward_custom_5}}}
Cycle 1:
{{{reward_1}}}
Cycle 2:
{{{reward_2}}}
Cycle 3:
{{{reward_3}}}
Cycle 4:
{{{reward_4}}}
Cycle 5:
{{{reward_5}}}
Cycle 6:
{{{reward_6}}}
Cycle 7:
{{{reward_7}}}
Cycle 8:
{{{reward_8}}}
Cycle 9:
{{{reward_9}}}
Cycle 10:
{{{reward_10}}}
Notes:
{{{notes_2}}}
{{{notes_3}}}
{{{notes_4}}}
{{{notes_5}}}
Robin's Memory
NPC: Love Hunter Robin
Location:
The Shrine's Secret Passage
Condition:
Level 5000+, have completed Indiana John - The Door of the Hidden Shrine
Request:
1x
The Truth in Memories (A)
1x
The Truth in Memories (B)
{{{request_3}}}
{{{request_4}}}
{{{request_5}}}
Quest Cycles: 1
XP: 7580776
TM XP: 1404191
Cycle 1:
1x Roxy
{{{reward_custom_2_text}}}:
{{{reward_custom_2}}}
{{{reward_custom_3_text}}}:
{{{reward_custom_3}}}
{{{reward_custom_4_text}}}:
{{{reward_custom_4}}}
{{{reward_custom_5_text}}}:
{{{reward_custom_5}}}
Cycle 1:
{{{reward_1}}}
Cycle 2:
{{{reward_2}}}
Cycle 3:
{{{reward_3}}}
Cycle 4:
{{{reward_4}}}
Cycle 5:
{{{reward_5}}}
Cycle 6:
{{{reward_6}}}
Cycle 7:
{{{reward_7}}}
Cycle 8:
{{{reward_8}}}
Cycle 9:
{{{reward_9}}}
Cycle 10:
{{{reward_10}}}
Notes:
The Truth in Memories (A) is obtained from
Enkicladus - Enkicladus in Robin's Memory and
The Truth in Memories (B) is obtained by completing
Nefertiti - Nefertiti in Robin's Memory .
Love Hunter Robin will transport you to Robin's Memory where these quests are.
After completing the quests, talk to Robin Van Peruoza to teleport back to this map and complete the quest.
{{{notes_4}}}
{{{notes_5}}}
[[{{{npc_name}}} - {{{quest_name}}}|{{{quest_name}}}]]
[[File:Npc {{{npc_image}}}.gif]]
NPC: {{{npc_name}}}
Condition:
Request:
{{{request_1}}}
{{{request_2}}}
{{{request_3}}}
{{{request_4}}}
{{{request_5}}}
10x Holy Leaf
Quest Cycles: {{{cycles}}}
XP: {{{xp}}}
TM XP: {{{tm}}}
{{{reward_custom_1_text}}}:
{{{reward_custom_1}}}
{{{reward_custom_2_text}}}:
{{{reward_custom_2}}}
{{{reward_custom_3_text}}}:
{{{reward_custom_3}}}
{{{reward_custom_4_text}}}:
{{{reward_custom_4}}}
{{{reward_custom_5_text}}}:
{{{reward_custom_5}}}
Cycle 1:
{{{reward_1}}}
Cycle 2:
{{{reward_2}}}
Cycle 3:
{{{reward_3}}}
Cycle 4:
{{{reward_4}}}
Cycle 5:
{{{reward_5}}}
Cycle 6:
{{{reward_6}}}
Cycle 7:
{{{reward_7}}}
Cycle 8:
{{{reward_8}}}
Cycle 9:
{{{reward_9}}}
Cycle 10:
{{{reward_10}}}
[[File:Minimap {{{map}}}.png]]
Notes:
{{{notes_1}}}
{{{notes_2}}}
{{{notes_3}}}
{{{notes_4}}}
{{{notes_5}}}
Inconvenient Request
NPC: Stargazer Ethel
Location:
Alteo Empire Field 3 - Sanctuary Forest
Condition:
Level 5000+, Have Rosaline Gracia - Preparations to Be One in quest log
Request:
10x
Wind Spirit Stone
10x
Water Spirit Stone
10x
Earth Spirit Stone
1x
Star Dust
{{{request_5}}}
Quest Cycles: 1
XP: 7580776
TM XP: 1404191
Cycle 1:
1x Bronze Coffee
{{{reward_custom_2_text}}}:
{{{reward_custom_2}}}
{{{reward_custom_3_text}}}:
{{{reward_custom_3}}}
{{{reward_custom_4_text}}}:
{{{reward_custom_4}}}
{{{reward_custom_5_text}}}:
{{{reward_custom_5}}}
Cycle 1:
{{{reward_1}}}
Cycle 2:
{{{reward_2}}}
Cycle 3:
{{{reward_3}}}
Cycle 4:
{{{reward_4}}}
Cycle 5:
{{{reward_5}}}
Cycle 6:
{{{reward_6}}}
Cycle 7:
{{{reward_7}}}
Cycle 8:
{{{reward_8}}}
Cycle 9:
{{{reward_9}}}
Cycle 10:
{{{reward_10}}}
Notes:
Star Dust Grandpa T - Honest Grandpa T .
{{{notes_3}}}
{{{notes_4}}}
{{{notes_5}}}
Make a Special Teleportation Device
NPC: Willie
Location:
Gate of Alteo Empire
Condition:
Have Rosaline - Metamorphosed Rosaline's Request in quest log
Request:
10x
Teleporting Device (Alteo)
15x
Electricity Spirit Stone
15x
Homunculus' Debris
{{{request_4}}}
{{{request_5}}}
Quest Cycles: 1
XP: 7580776
TM XP: 1404191
Cycle 1:
{{{reward_custom_2_text}}}:
{{{reward_custom_2}}}
{{{reward_custom_3_text}}}:
{{{reward_custom_3}}}
{{{reward_custom_4_text}}}:
{{{reward_custom_4}}}
{{{reward_custom_5_text}}}:
{{{reward_custom_5}}}
Cycle 1:
{{{reward_1}}}
Cycle 2:
{{{reward_2}}}
Cycle 3:
{{{reward_3}}}
Cycle 4:
{{{reward_4}}}
Cycle 5:
{{{reward_5}}}
Cycle 6:
{{{reward_6}}}
Cycle 7:
{{{reward_7}}}
Cycle 8:
{{{reward_8}}}
Cycle 9:
{{{reward_9}}}
Cycle 10:
{{{reward_10}}}
Notes:
Teleporting Device (Alteo) is purchased from Item Boy Thomas for 15,000g each,
Electricity Spirit Stone is dropped by
Electricity Spirit File:Monster Electricity Spirit Idle.gif , and
Homunculus' Debris is drilled in Alteo Empire fields.
{{{notes_2}}}
{{{notes_3}}}
{{{notes_4}}}
{{{notes_5}}}
An Apology
NPC: Don Giuvanni
Condition:
Level 200+, have completed Don Cavalier - Evil Don Giuvanni
Request:
Talk to Don Danihen
{{{request_2}}}
{{{request_3}}}
{{{request_4}}}
{{{request_5}}}
Quest Cycles: 1
XP: 7580776
TM XP: 1404191
Cycle 1:
1x Red Cupid Wings
{{{reward_custom_2_text}}}:
{{{reward_custom_2}}}
{{{reward_custom_3_text}}}:
{{{reward_custom_3}}}
{{{reward_custom_4_text}}}:
{{{reward_custom_4}}}
{{{reward_custom_5_text}}}:
{{{reward_custom_5}}}
Cycle 1:
{{{reward_1}}}
Cycle 2:
{{{reward_2}}}
Cycle 3:
{{{reward_3}}}
Cycle 4:
{{{reward_4}}}
Cycle 5:
{{{reward_5}}}
Cycle 6:
{{{reward_6}}}
Cycle 7:
{{{reward_7}}}
Cycle 8:
{{{reward_8}}}
Cycle 9:
{{{reward_9}}}
Cycle 10:
{{{reward_10}}}
Notes:
Players have been known to get stuck on this map and unable to teleport out. If this happens, please DM @Shiro on Discord for assistance.
{{{notes_2}}}
{{{notes_3}}}
{{{notes_4}}}
{{{notes_5}}}

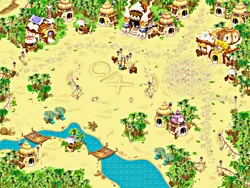


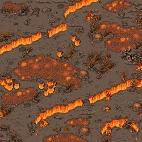

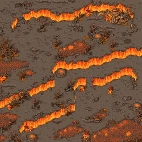


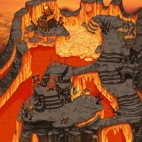


